Tuesday, October 25, 2011

Super Sloppy Joes - Rachel Ray

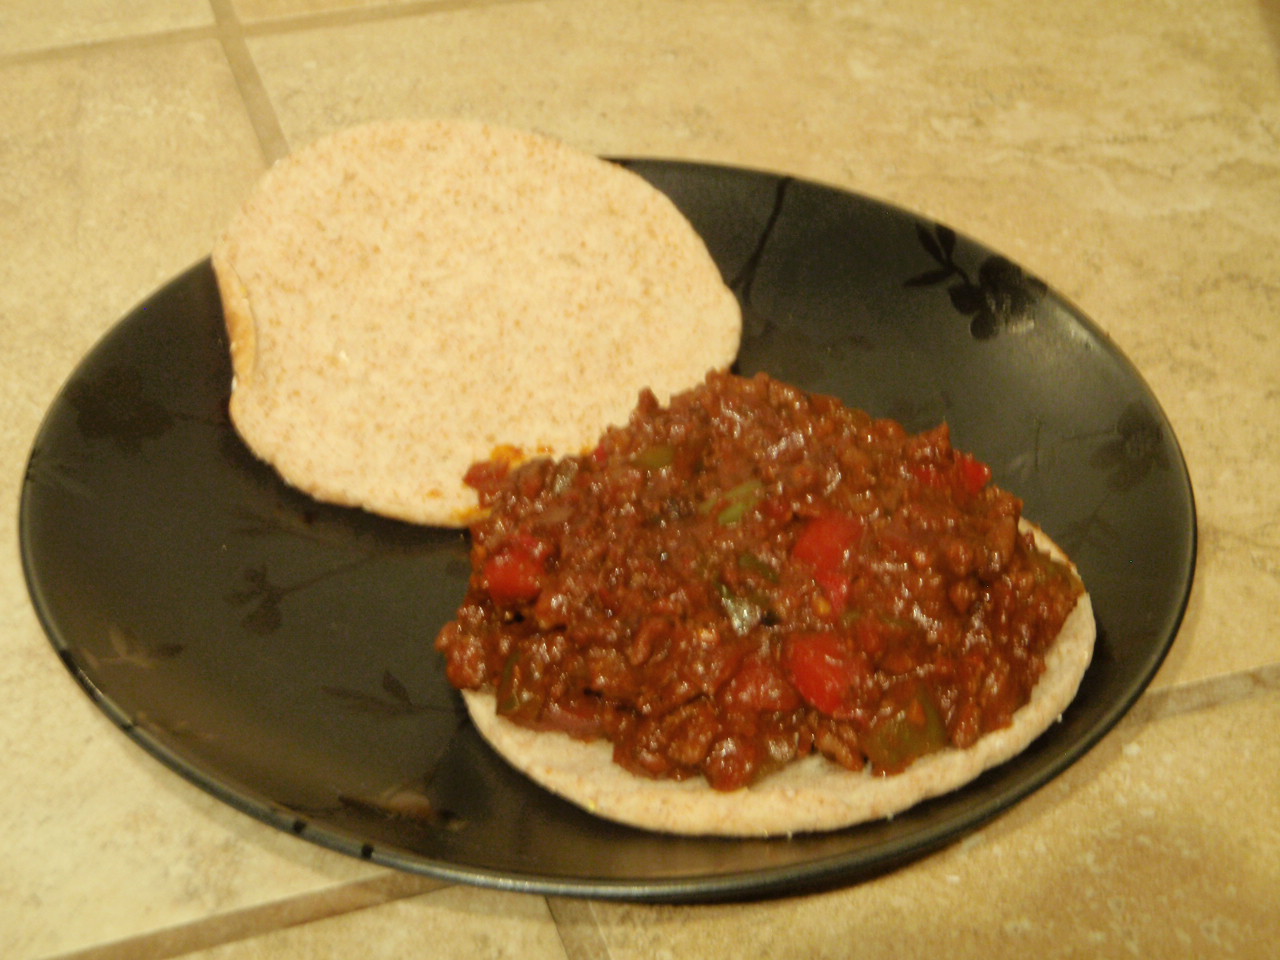
Tasty Tuesday - Super Sloppy Joes - Rachel Ray


When we got back from backpacking weeks ago we needed something hearty and savory. We also needed to make something that was going to get rid of some of the things in the fridge. I feel like we have been throwing away lately and I feel like we need to have a clean slate in the kitchen. We are trying to get rid of all of the old stuff that we have been holding on to. Today beef, red onions, pasta sauce, tomato paste (when do you ever use a whole can? So when I open a new one I freeze the rest into ice cubes), pasta sauce, and red and green peppers.    


Ingredients

  • 1 tablespoon extra-virgin olive oil, 1 turn of the pan
  • 1 1/4 pounds ground beef sirloin ( I used one it was what we had handy)
  • 1/4 cup brown sugar (we were out so I used 1/4 cup white sugar and some molassas)
  • 2 teaspoons to 1 tablespoon steak seasoning blend, such as McCormick brand Montreal Seasoning
  • 1 medium onion, chopped (I used the red onion that I had in the fridge)
  • 1 small red bell pepper, chopped (I also used a green pepper since we had one on hand)
  • 1 tablespoon red wine vinegar
  • 1 tablespoon Worcestershire sauce
  • 2 cups tomato sauce (I used pasta sauce)
  • 2 tablespoons tomato paste (frozen cubes)
  • 4 crusty rolls, split, toasted, and lightly buttered


Directions

Heat a large skillet over medium high heat. Add oil and meat to the pan. Spread the meat around the pan and begin to break it up. Combine brown sugar and steak seasoning. Add sugar and spice mixture to the skillet and combine. When the meat has browned, add onion and red peppers to the skillet. Reduce heat to medium and cook onions, peppers, red wine vinegar and Worcestershire sauce with meat for 5 minutes. Add tomato sauce and paste to pan. Stir to combine. Reduce heat to simmer and cook Sloppy Joe mixture 5 minutes longer.  Have plenty of napkins on hand!


Recipe by Rachel Ray can be seen here

Wednesday, October 19, 2011

Master Bedroom Update

Remember a while ago when I was talking about the color that we wanted to paint our bedroom? If not you can check out the post here. Well it was the weekend of my birthday when we happened to find out that the paint at Sherwin Williams was 40% off so not only did we get the paint and primer for the dining room chairs that we went in for we got the paint for the master bedroom as well. When we were getting the room ready to paint I talked to Mikey about another issue that I wanted us to fix.


We somehow ended up with high-water curtains. As a tall individual I would say that few things irritate me more than high-water pants and high-water curtains fall into the same category. 


As we were putting out the drop cloth to paint I realized that you can probably tell a lot about a person by looking at their drop cloth. 


I love the depth of this color how much it changes when the window are open or closed. 


When mom and Greg were out here for the wedding one of the gifts they got us was the bed frame that we have been coveting for a while from West Elm:
We will eventually get the matching headboard and nightstands but I want to wait until they are 15% off. Then it will look like this:


Just in the chocolate color. I want swinging arm lamps so we still have room for storage. 


The curtains are still a bit high for my liking but I have a plan... More to come. 


The screen in the back I found at Salvation Army one day for $7.50. The slats in the bed are kind genius, even if you have a bed with regular slats just get some ribbons and a staple gun measure it out and staple it on then they are all equal distance apart and connected. 

We added our duvets that we had gotten previously. 


The large print that I painted the frame and the mat for also found a home in there.  

Upcoming projects for the Master Bedroom:

  • Scrabble tile art
  • Extended curtains
  • Picture Ledges

Tuesday, October 18, 2011

Brie en Croute adapted from Paula Deen

Tasty Tuesday - Brie en Croute adapted from Paula Deen

I LOVE brie! So does Mikey. It is hard to come back to reality after having such a wonderful few weeks. So to add a bit of pizazz to or life I made Brie en Croute adapted from Paula Dean. To see her recipe.


Ingredients

  • 1 sheet frozen puff pastry (package comes with 2 sheets) I use this stuff you can get it at Whole Foods it is expensive but unmatched in my experience.


  • 1 tablespoon butter
  • 1/4 cup chopped pecans or walnuts (we used pecans)
  • 1 small (8-ounce) wheel Brie
  • 1/2 cup raspberry jam (we drizzled the whole thing in honey instead)
  • eggs, beaten

Directions

Preheat oven to 375 degrees F. Defrost 1 sheet of puff pastry for approximately 15 to 20 minutes and unfold (place remaining sheet in freezer for later use). Melt butter in a saucepan over medium heat. Saute nuts in butter until golden brown, approximately 5 minutes. Place nuts on top of Brie and spread jam on top of nuts. Gently roll pastry with a rolling pin to increase the size of the sheet 1 to 2 inches in each direction. Brush both sides of the sheet with beaten egg. Center the wheel of Brie on top of the pastry sheet. Bring all four corners of the sheet together above Brie and twist slightly to form a "bundle." Tie gathered pastry with kitchen/cooking string (tie string in the form of a bow), arranging pastry until you are satisfied with the "bundle" shape. Place "bundle" on an ungreased cookie sheet and bake for 20 to 25 minutes until pastry is golden brown. Serve with top-quality crackers.


This is what we ended up with:

Yum!


Saturday, October 15, 2011

Happy Sofa Day!!!

One of our AMAZING wedding gifts is coming today!!! I am so very excited! After a decade of coveting this sofa:


It should be here by 3! Happy dance!


Friday, October 14, 2011

A to Z (bookends)


I found this at Dream Book Design and I felt the urge to fill it out. 

A. age :: twenty eight

B. bed size :: queen

C. chore you hate :: dusting

D. dogs :: none now but one day Gizmo and Bamf

E. essential start to your day :: snooze, shower, tea

F. favorite color :: Tiffany blue

G. gold or silver :: silver

H. height :: five feet eleven and 1/2

I. instruments you play :: used to play the flute and there was one night a 
tambourine

J. job title :: wife and friend, Inventory and Operations Supervisor

K. kids :: none yet

L. live :: Littleton, CO

M. maiden name :: Tietz (I have heard all the jokes)

N. nicknames :: Smello, t, Martha Child

O. overnight hospital stays :: Only when I was little

P. pet peeve :: mouth noises, bad neighbors, mean people

Q. quote ::
  
“Be who you are and say what you feel, because those who mind don't matter, and those who matter don't mind.” ― Dr. Seuss

R. righty or lefty :: right

S. siblings :: Chris, Chris, Shannon, Angela & Bradley

T. time you wake up :: Usually around 4, unless its Friday its 3.

U. university attended :: University of Colorado


V. vegetables you dislike: beets, love the rest

W. what makes you run late :: procrastination

X. x-rays you’ve had :: This year MRIs and cat scans

Y. yummy food :: steak, deserts, cheese

Z. zoo animal favorite :: Giraffes

Thursday, October 13, 2011

Thrifting Thursday

I have not been going thrifting as much as usual during the whole wedding process. I thought I would share a few things with you, first things I did not end up getting:


I would love to get some solid wood bookcases to replace our black ones. They are the first thing you see when you come in to our place. I thought I had found a set for $14.99 each but when I brought Mikey in he said they were just veneer. I wanted to strip them, sand them and stain them black but with just veneer it is not worth the risk. 


This end table had a similar story. I love its midcentry lines and how it would have complemented our entertainment center. I could tell that the legs were solid the top and casing was veneer which I was ok with on this piece. I had wanted to remove the handle and put a matching handle to our entertainment center. That was why this piece failed to launch. The way the handle was secured on would not come off without marring the whole front. Darn. 


This piece I did come home with for only $.78. This picture does not do it justice. It is completely made from wax. Seriously... The back says:

Miniature Wax Pictures
By Colleen and Scott Rice 
These beautiful miniatures are painted with melted colored wax on paper using a patented technique called CireCraft. Marie-Claire Wadden, a French painter, developed CireCraft fifteen years ago from inspiration she received in a dream.
Specially coated paper is pulled through pools of melted wax to achieve the background. Then a small iron is used to paint in the subject matter and accents. The iron acts much like a palette knife does working with oils, adding or removing wax and blending colors. Because the wax has a mind of its own, each painting is unique and cannot be duplicated.

There was then their names and phone number. Which I considered placing here so if people were interested in the wax painting they could contact them. Putting your name and phone number on the back of a painting is very different then putting your info on the net. So I googled them to see if they had a site. I found something unexpected. It kind of blows my mind, but the info is consistent.


Tuesday, October 11, 2011

Ganache Kit Kat Cake

Tasty Tuesday - Kit Kat Cake

I have been seeing these all over blogland and I have really wanted to make one. Well this weekend it happened. We were having a family get together at my dad and Lisa's house with Mikey, myself, dad, Lisa, my in-laws Mary and Leonard, my brother Chris and his new wife Sandy as well as her parents Mark and Debbie. I figured if there was ten of us we probably would not die from eating this cake.


We started with this stuff:


I do not usually use cake mixes but someone gave us a bunch for a wedding gift. Peanut butter M & Ms and 12 Kit Kat bars.


9 inch cake rounds, oiled and floured.


Then we covered it in Ganache, which sounds intimating but it is just 1 cup of heavy cream brought to a slight boil and you slowly add 9 ounces of shaved semi-sweet chocolate. Wisk until smooth.


Cover the bottom round with Ganache, pour it into the center and spread outward. Add top round.


Smooth the Ganache on the sides and add Kit Kat bars, snapped into 2 bars each.


Pour M&Ms on top. A lot of people use a whole bag we only used half.


We added the ribbon as we had to travel and hour with the cake but while other people had discussed the Kit Kats being to heavy for the frosting, the Ganache held them just fine. We put it in the fridge for an hour before we left to have it set up a bit. 


Linked up at 

Sunday, October 9, 2011

Posts to look forward to

Just because I have not been blogging doesn't mean I have not been crafting, baking and decorating. Here are somethings you can look forward to in the coming weeks:

Upcoming projects
  • Sofa table 
  • Master bathroom
  • Picture ledges

Saturday, October 8, 2011

I know I have been gone for a while...

I was getting married. I have actually been very busy doing a ton of projects but I have not been posting. I did not want to post all the wedding crafts as I wanted it to be a surprise for the people that were coming. It was a four day event and it was wonderful. I have always wanted a multi-day wedding after seeing My Best Friend's wedding, minus someone trying to steal my husband. After the whole event, which I will be posting about in stages and our mini honeymoon we came home to this:


Our welcome mat scattered with our aspen leafs.


"Our wedding sign" (thanks Diane) and flowers outside.


One of our favors on our wreath hook and Just married sign on the door, they were also on every window and mirror in the condo.


Our aspen grove fingerprint tree.


Presents all ready to be opened and some leftovers of the bridal shower.


Bouquets drying and wedding decor everywhere. 


Our cabin cardholder, birch candles and table markers.


Breakfast at Tiffany's eye mask laid out for sleep.